Internal Network Scanning
HostedScan provides scalable and secure options to connect vulnerability scanners on internal networks to hostedscan.com for centralized management and reporting.
This secure solution does not require any open ports, tunnels, or other access to your network.
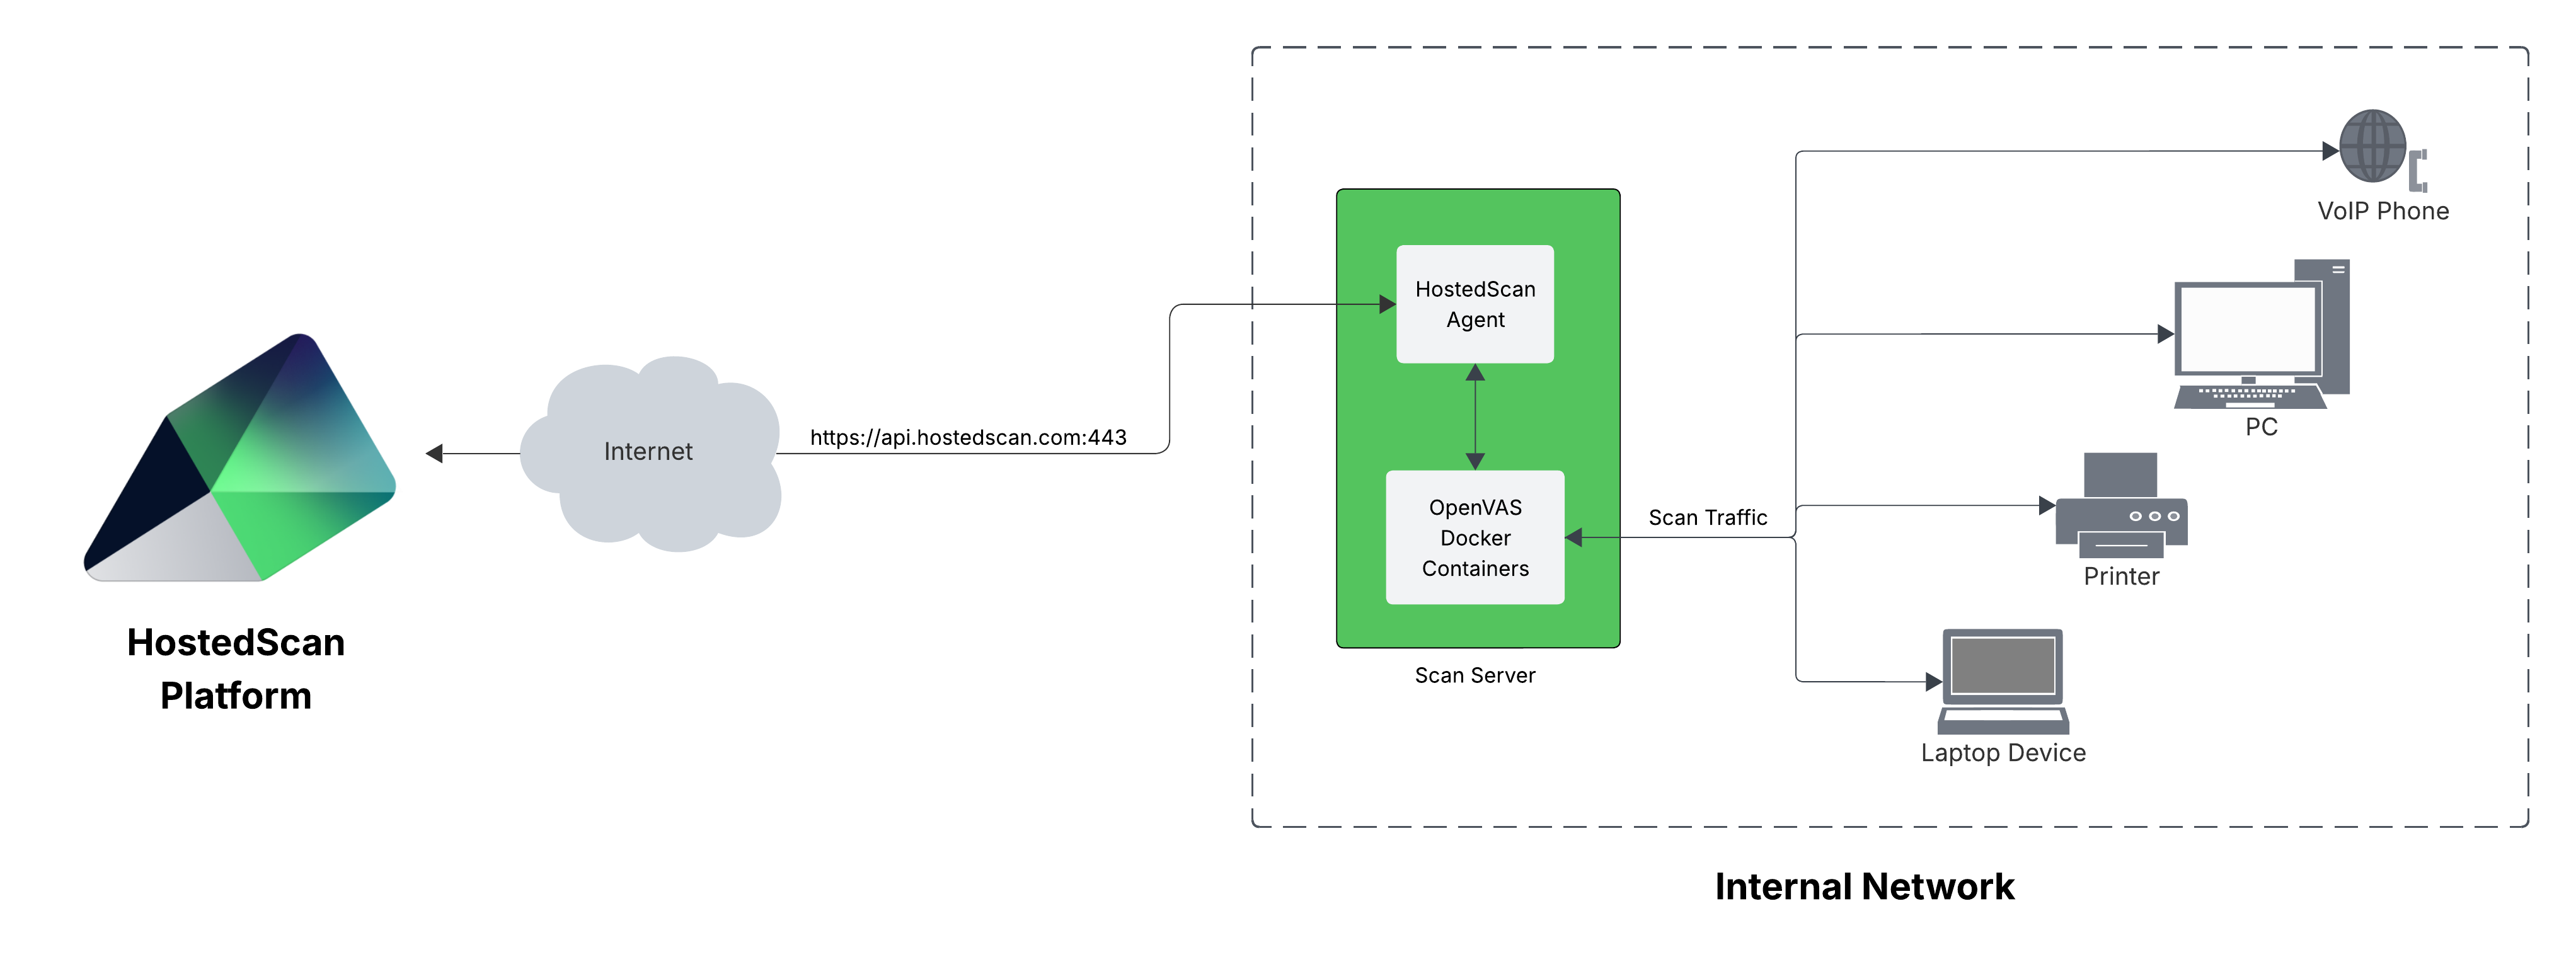
How it works
To run vulnerability scans on an internal network, you will install trusted vulnerability scanners that are widely used across the industry by millions of cybersecurity professionals, alongside the lightweight HostedScan Internal Scanner application on a single scanning server. The internal scanner orchestrates the underlying vulnerability scanners and connects to HostedScan to enable full command and control from your HostedScan dashboard.
Set up and run the HostedScan Internal Scanner
For detailed system requirements, see the Install the Internal Scanner on Linux guide.
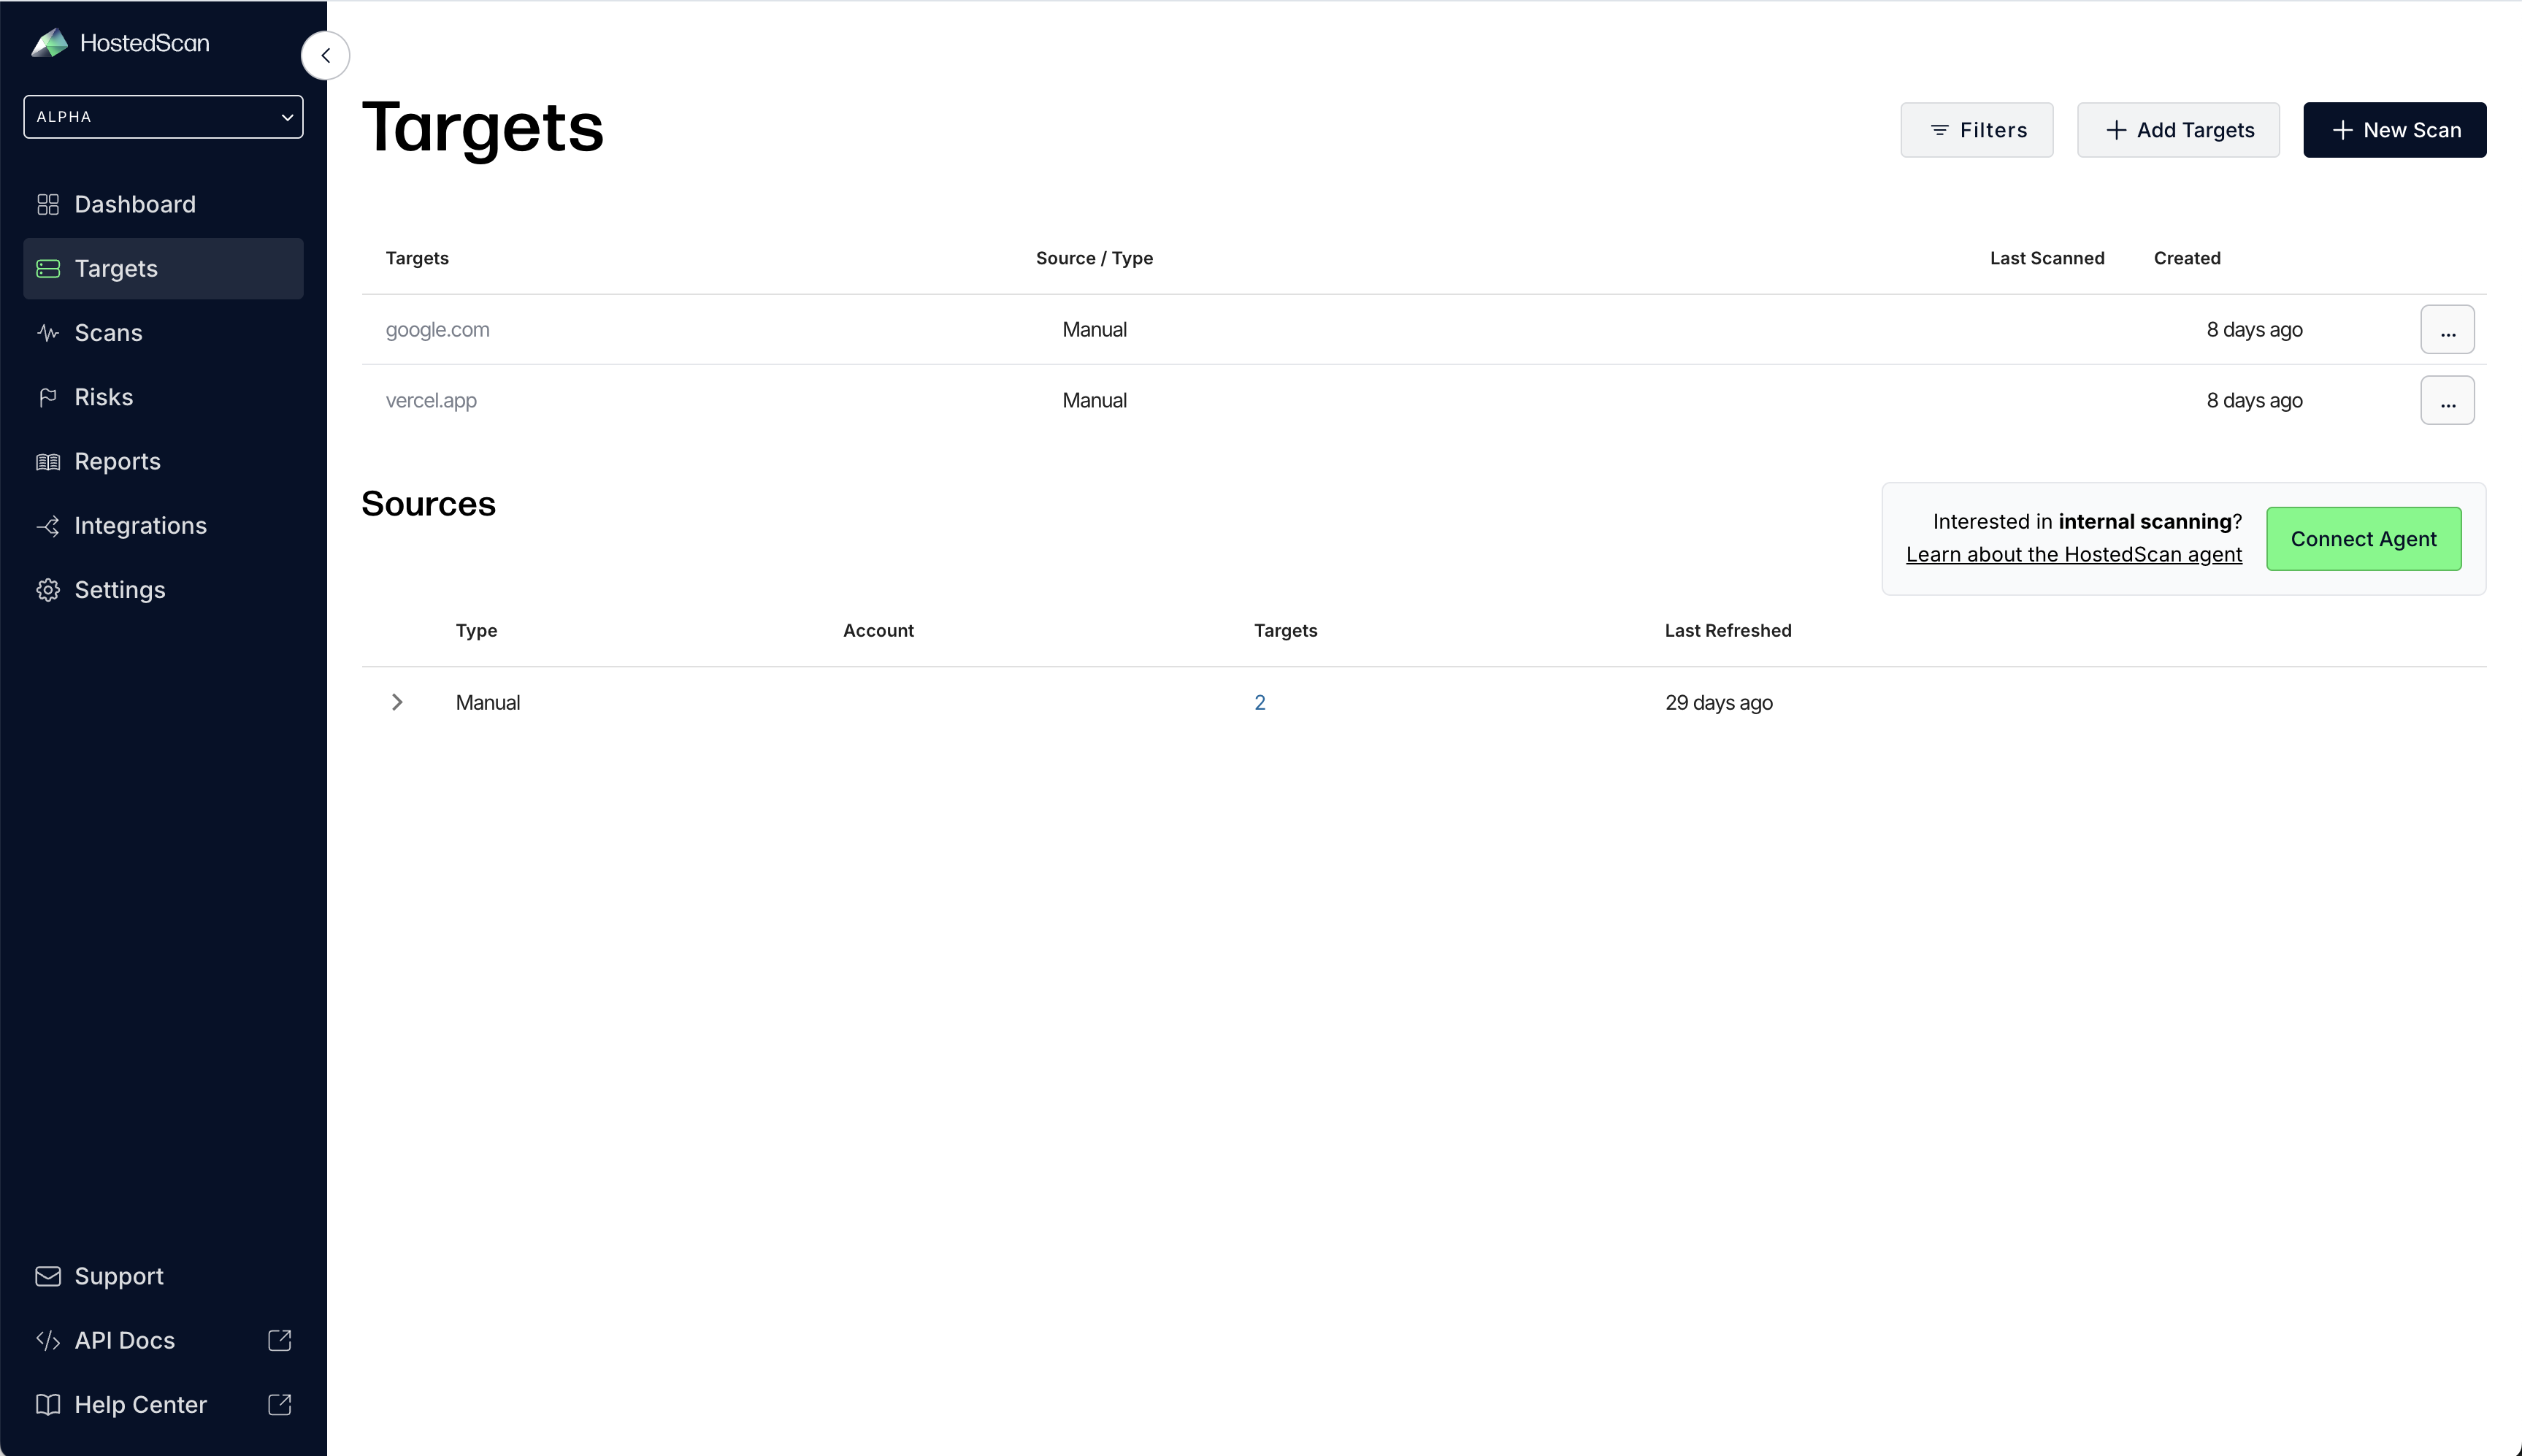
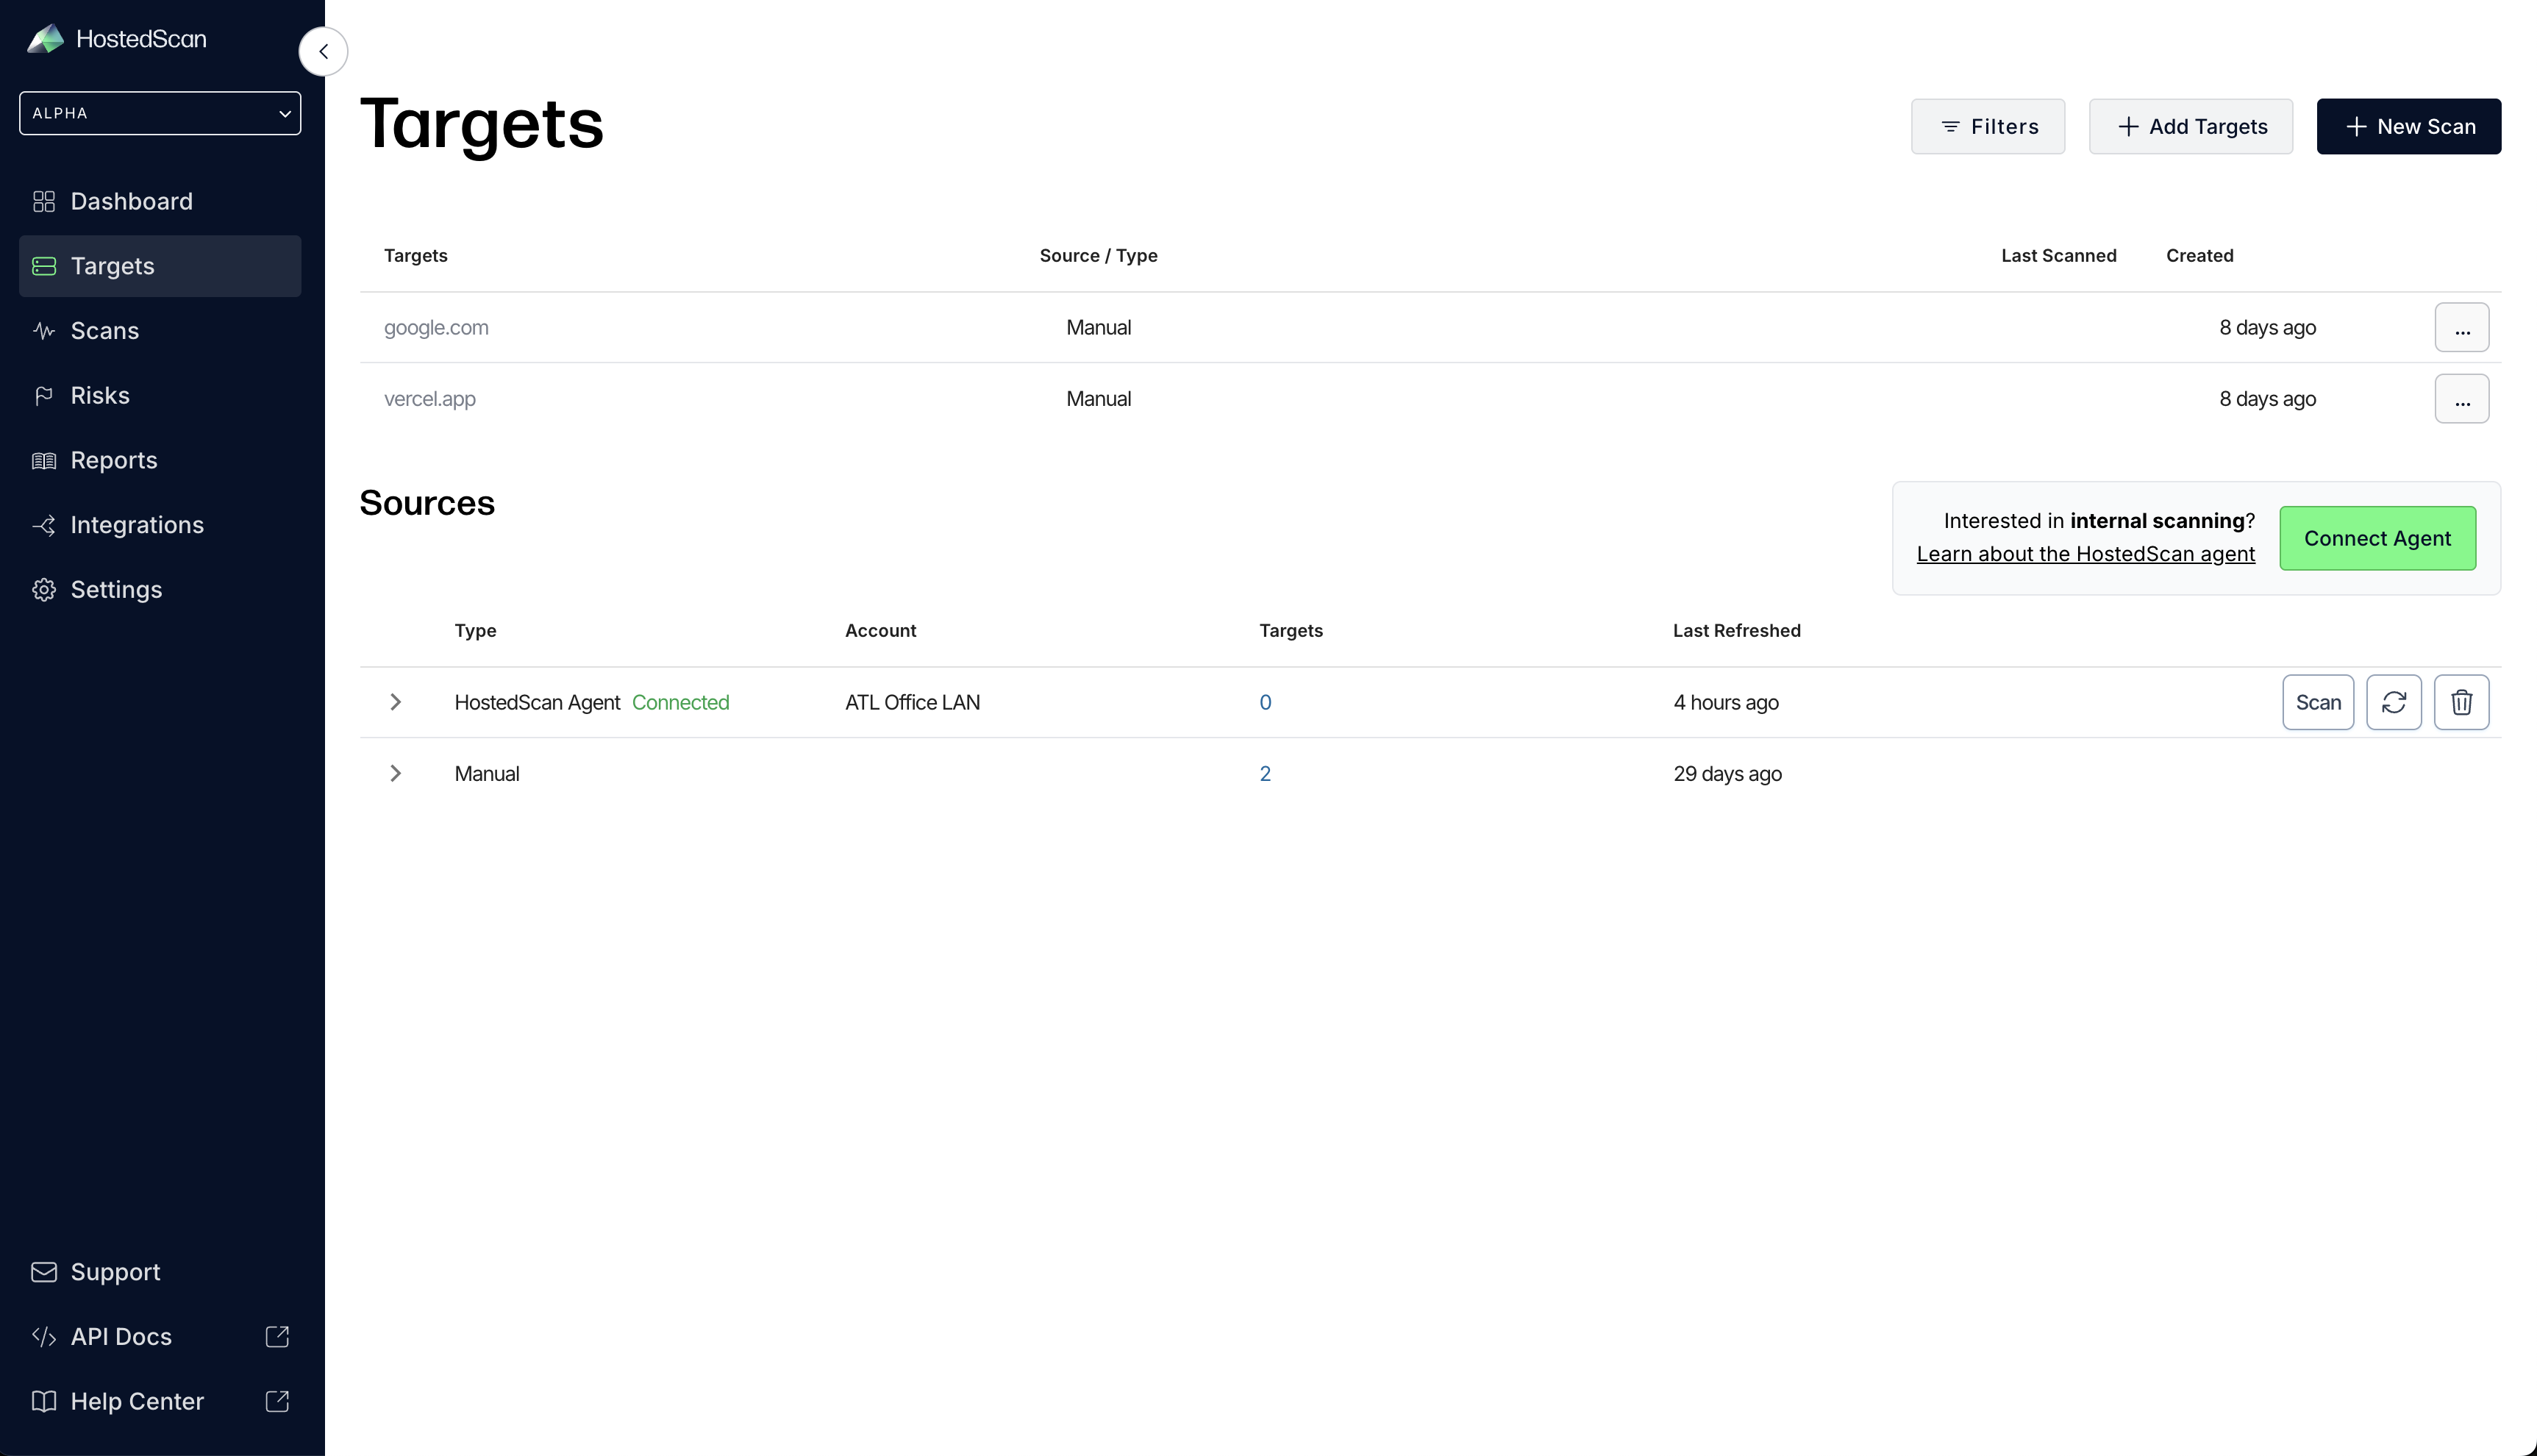
- Connect a new internal scanner by clicking on Connect Internal Scanner on the targets page.
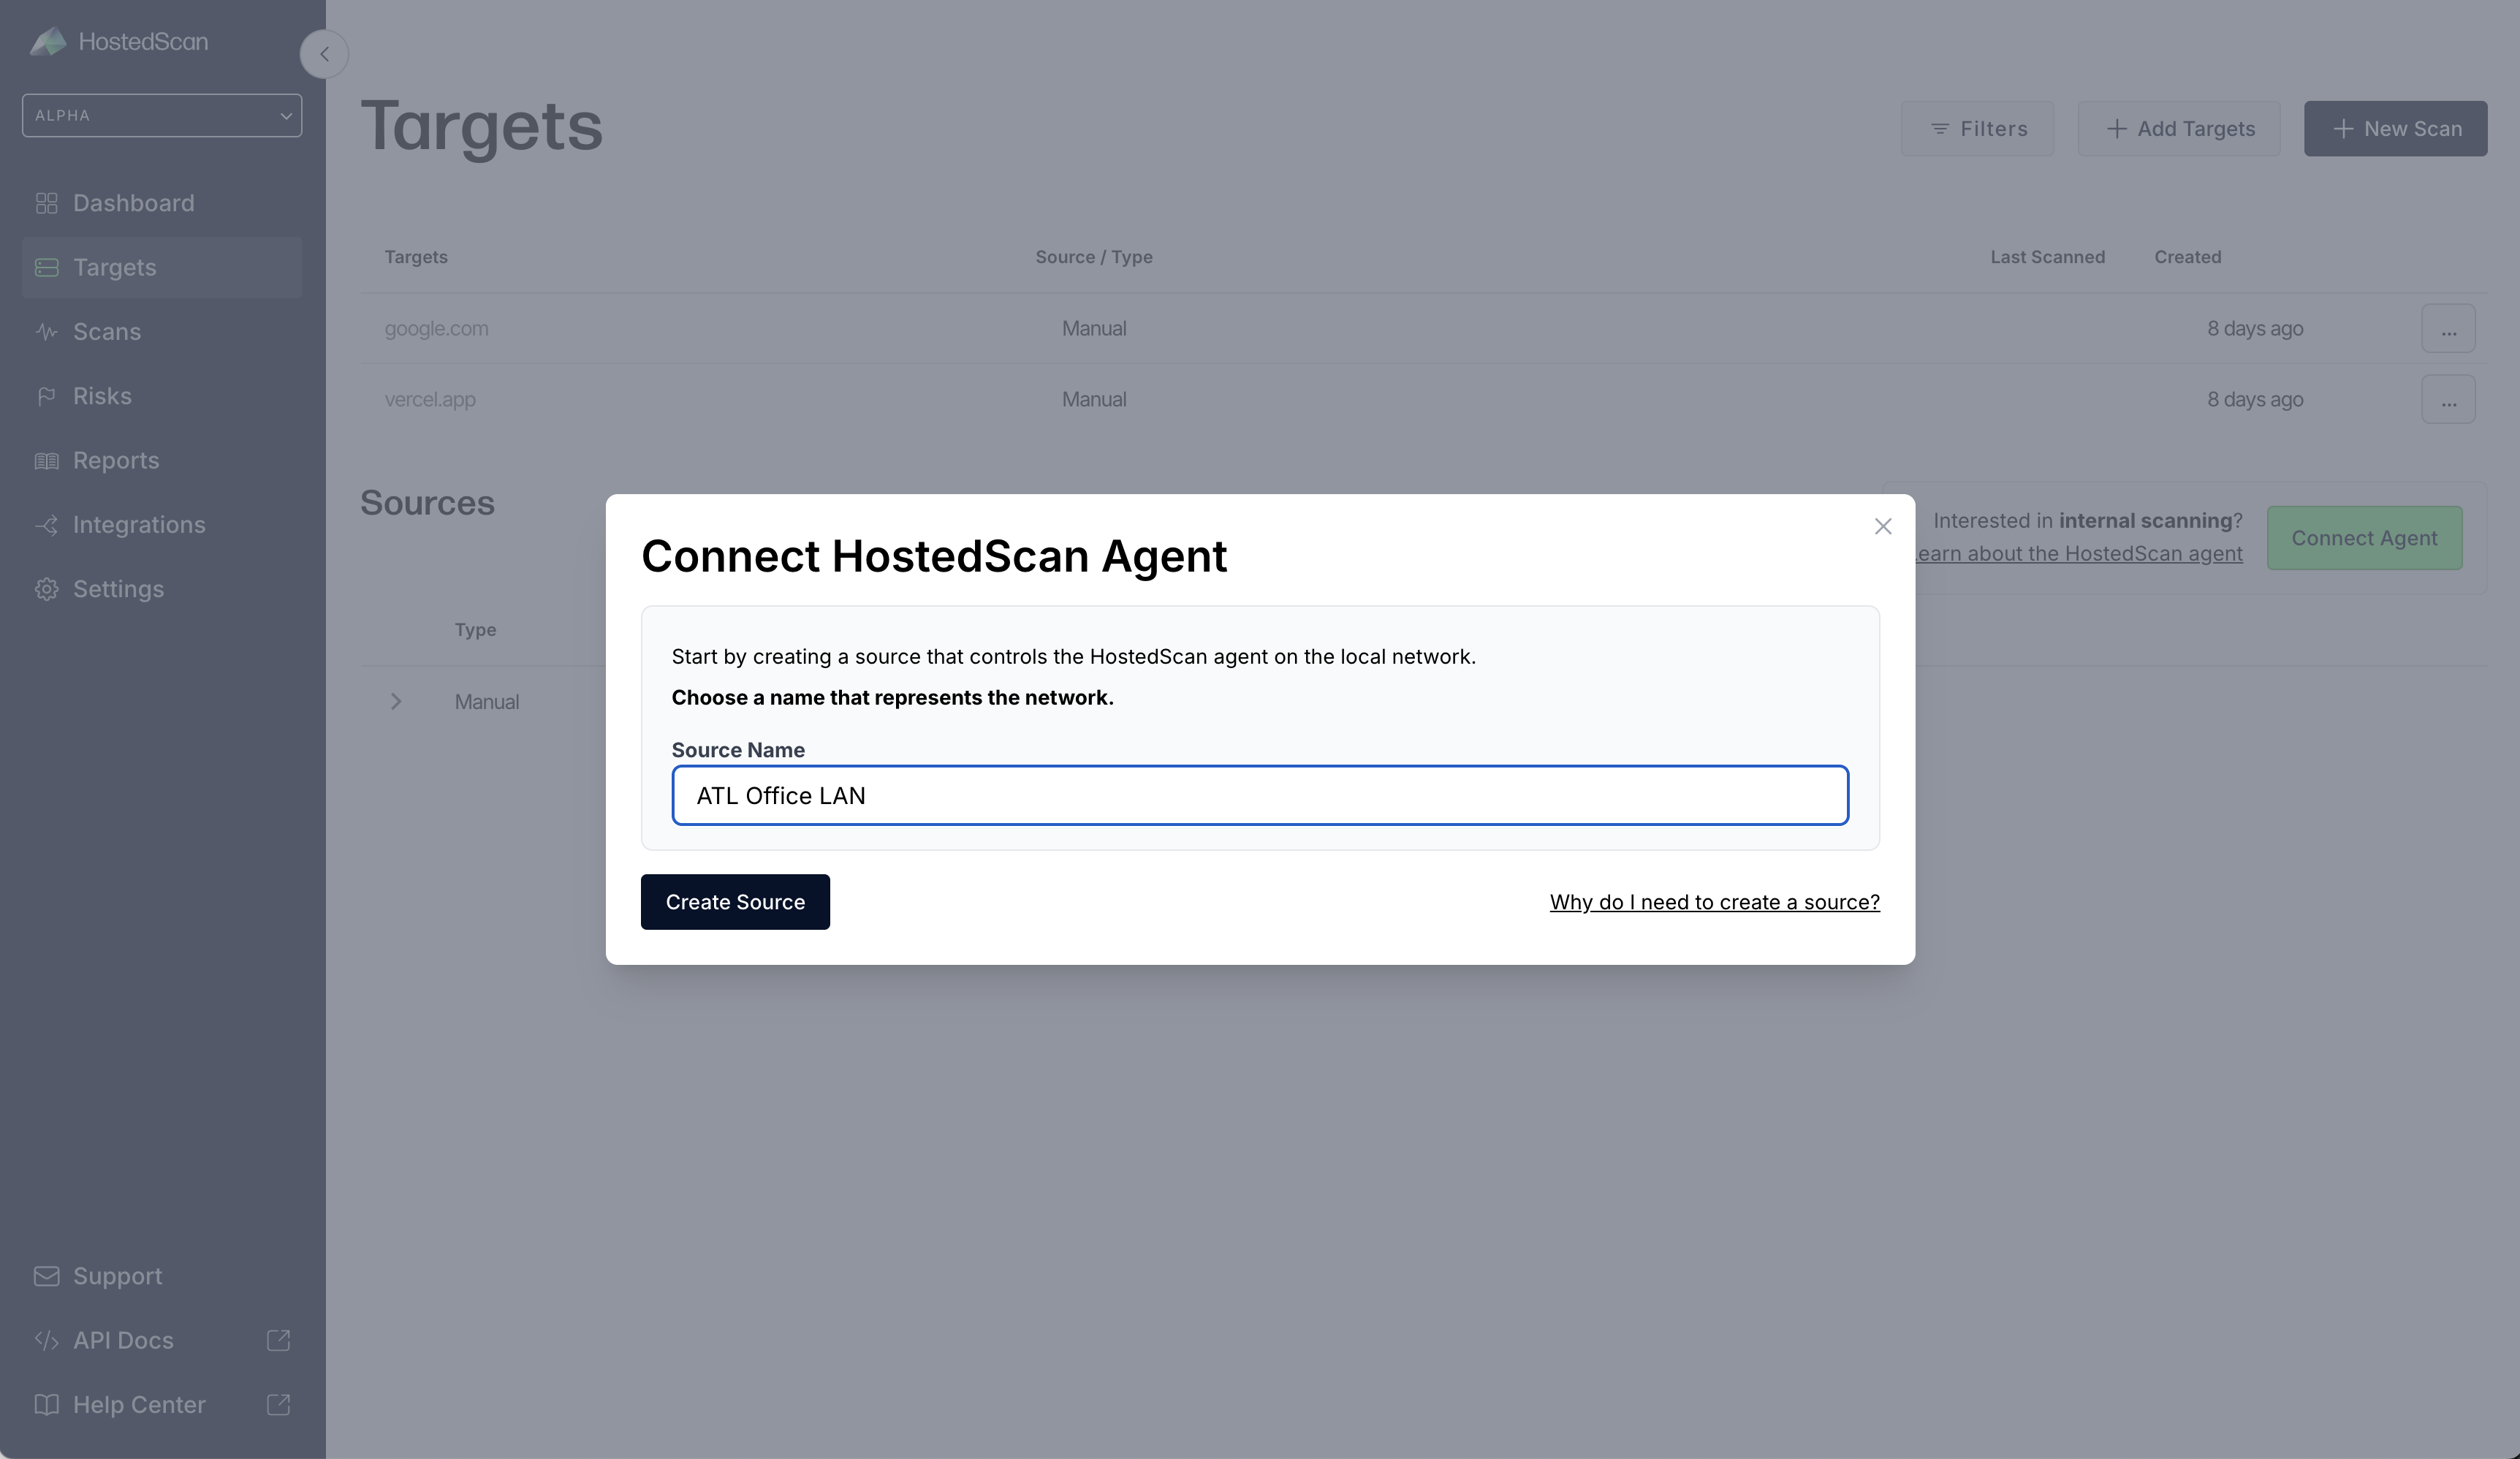
- Choose a name for the source network. You will initiate scans under this source network, and discovered targets will be grouped by it.
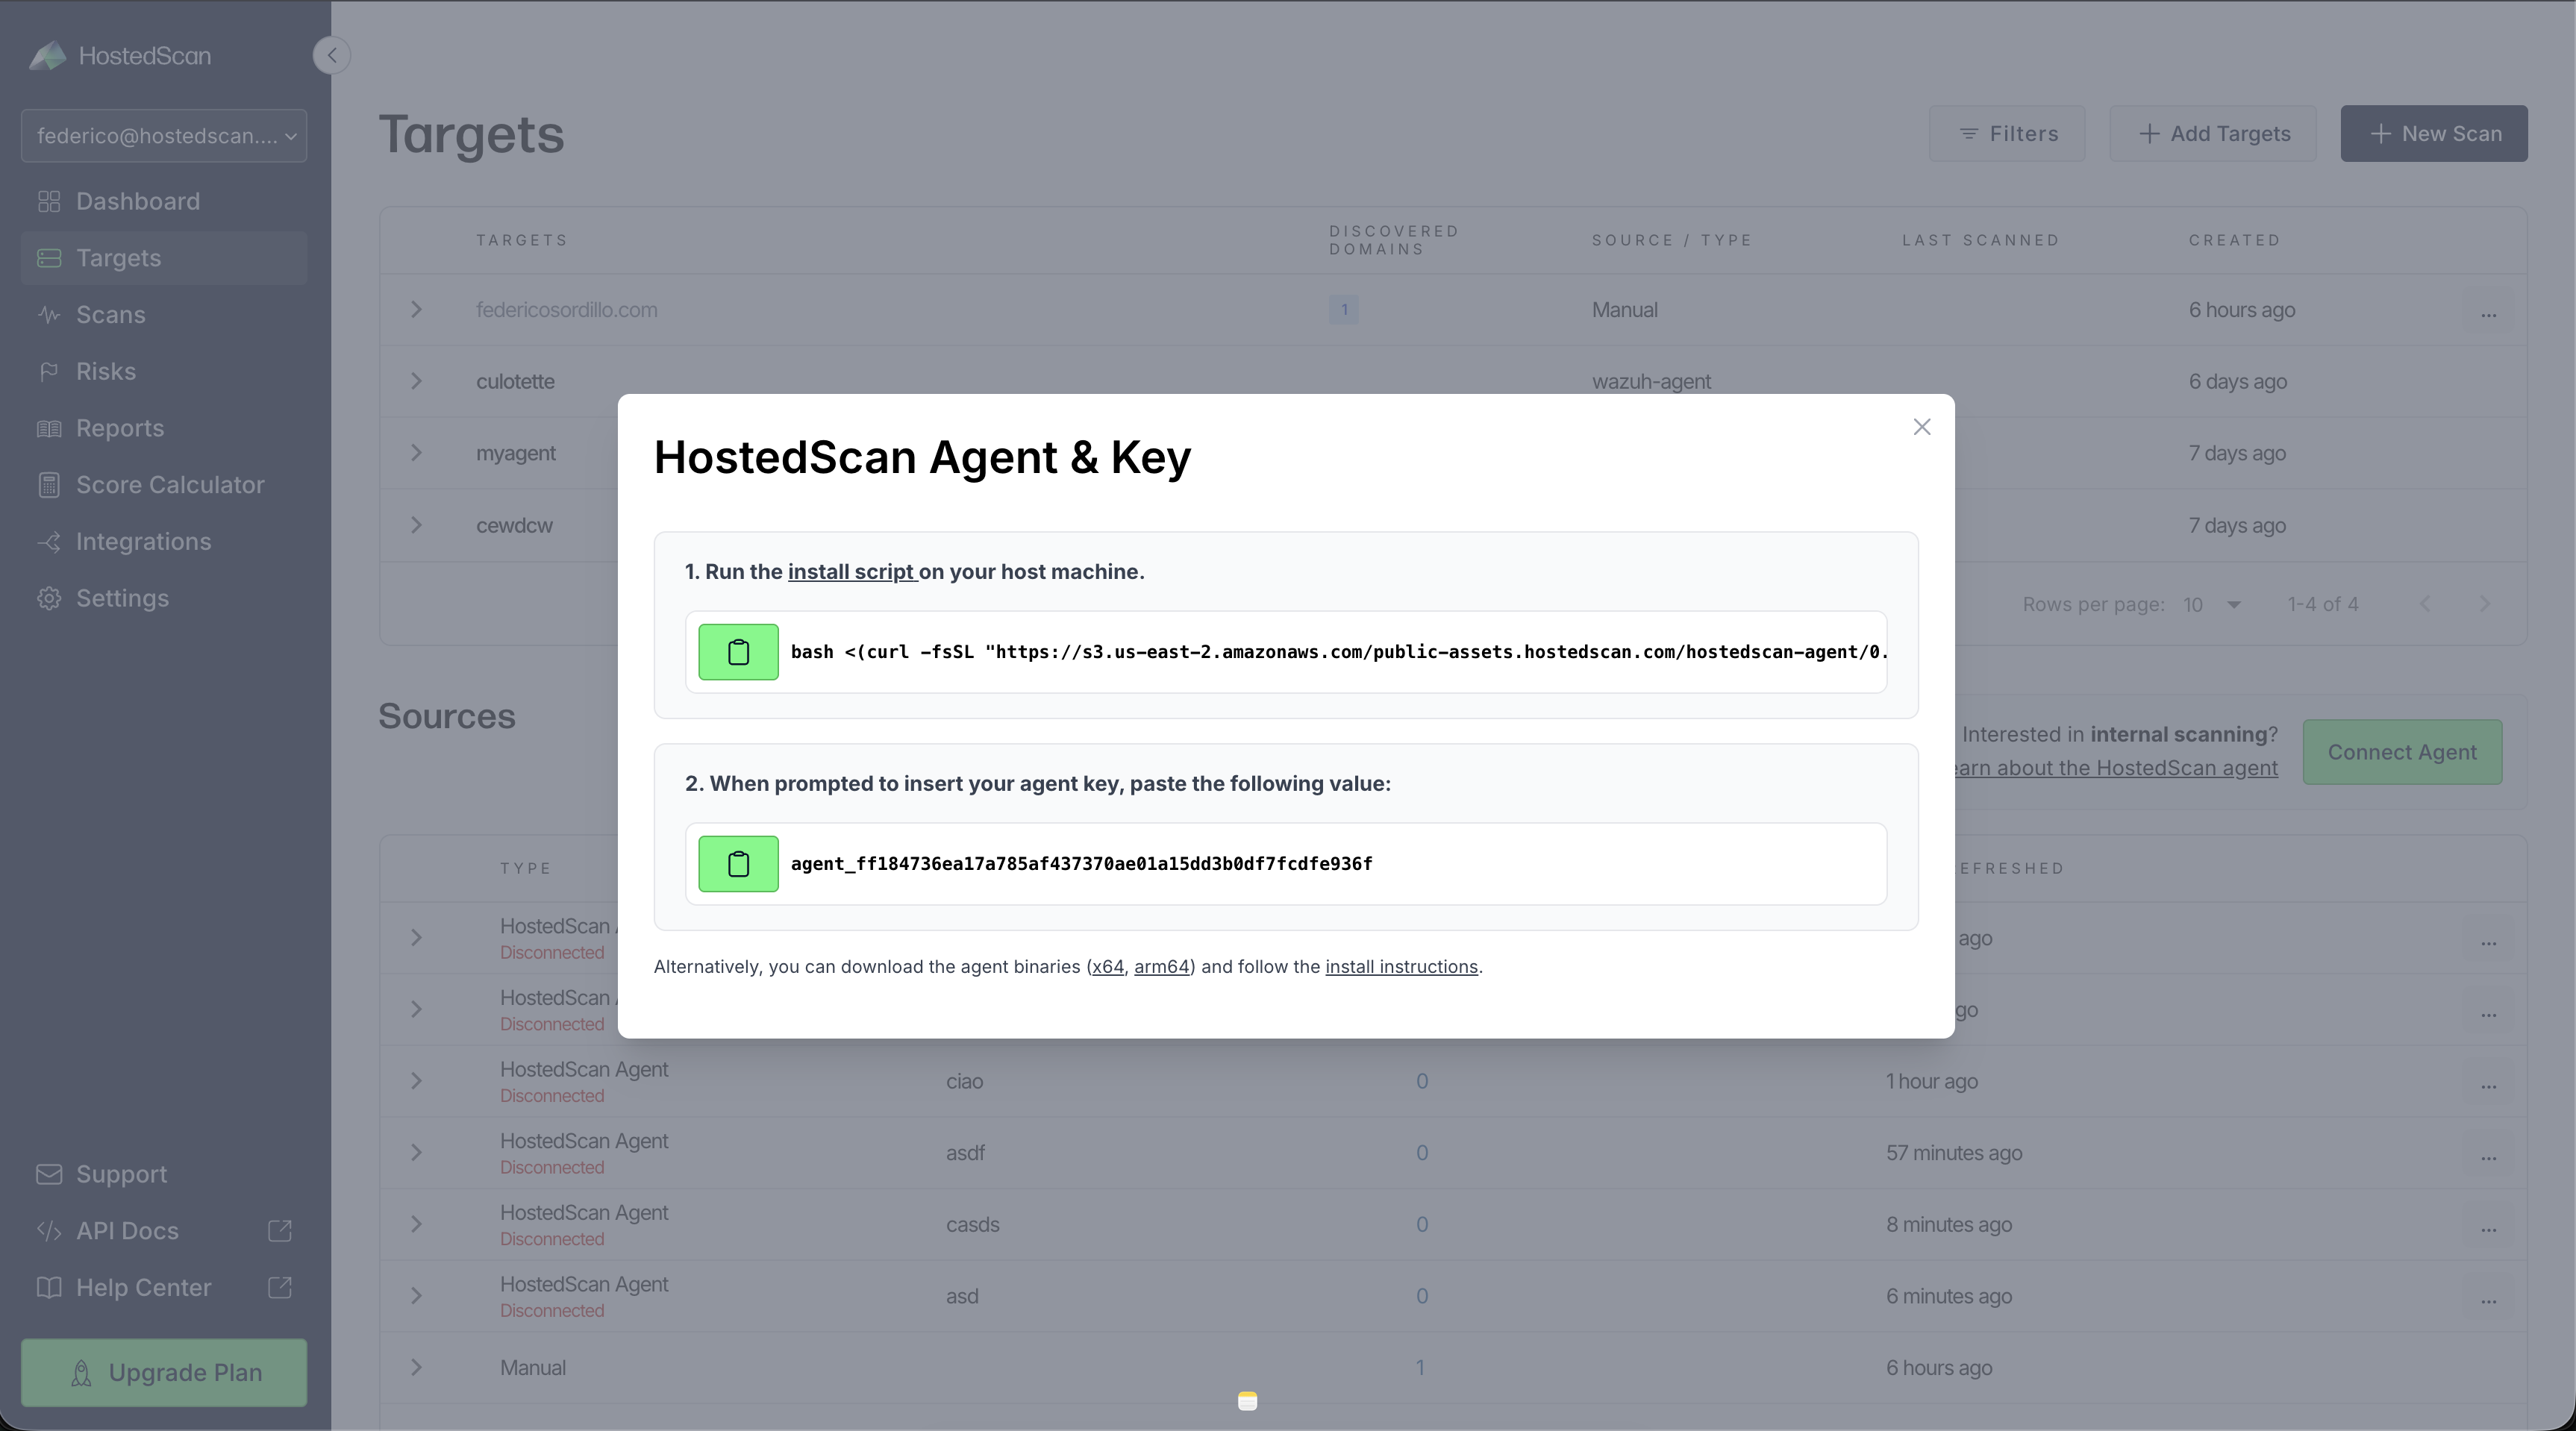
- Run the install script on your host machine (alternatively, install the internal scanner according to our Install the Internal Scanner on Linux guide).
Ensure that you copy the HostedScan Internal Scanner registration key before closing the modal. The key is used to authenticate your installation of the internal scanner to hostedscan.com.
- At this point, the HostedScan Internal Scanner source network will show as Disconnected in the Sources table. After a few minutes you should see it transition to Connected, that's when you are ready to run your first internal network scan.
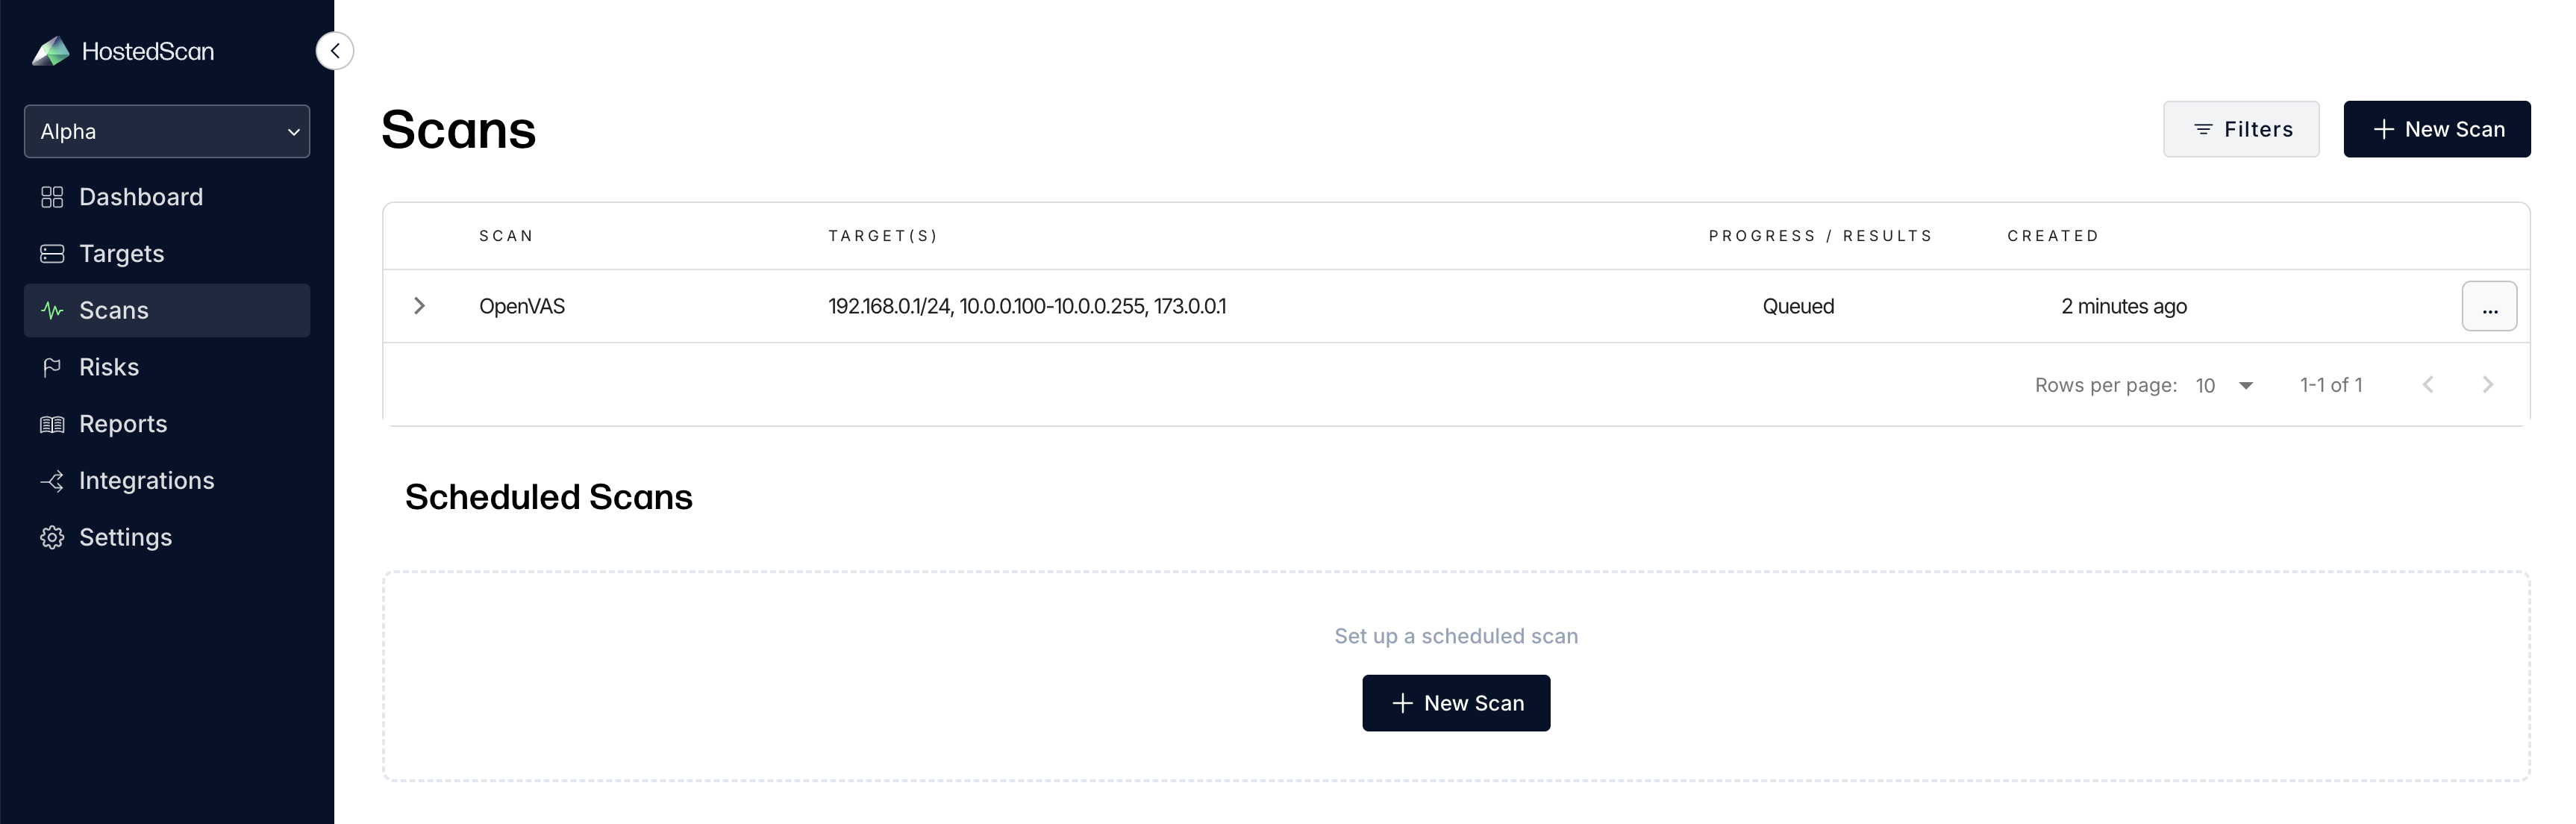
Run your first scan
- Click the Scan button for your source network.
-
Set Scope: Enter the IP ranges and individual IP addresses you want to scan. You can:
- Add CIDR ranges (e.g.,
192.168.1.0/24) to scan entire subnets - Add individual IP addresses (e.g.,
192.168.1.100) for specific targets - Add ranges of IP addresses (e.g.,
192.168.1.15-192.168.1.100) for specific sub ranges of targets - Use multiple ranges to scan different network segments in a single scan
For each item or range added, you can add specific tags that will be added to each target discovered in that range.
- Add CIDR ranges (e.g.,
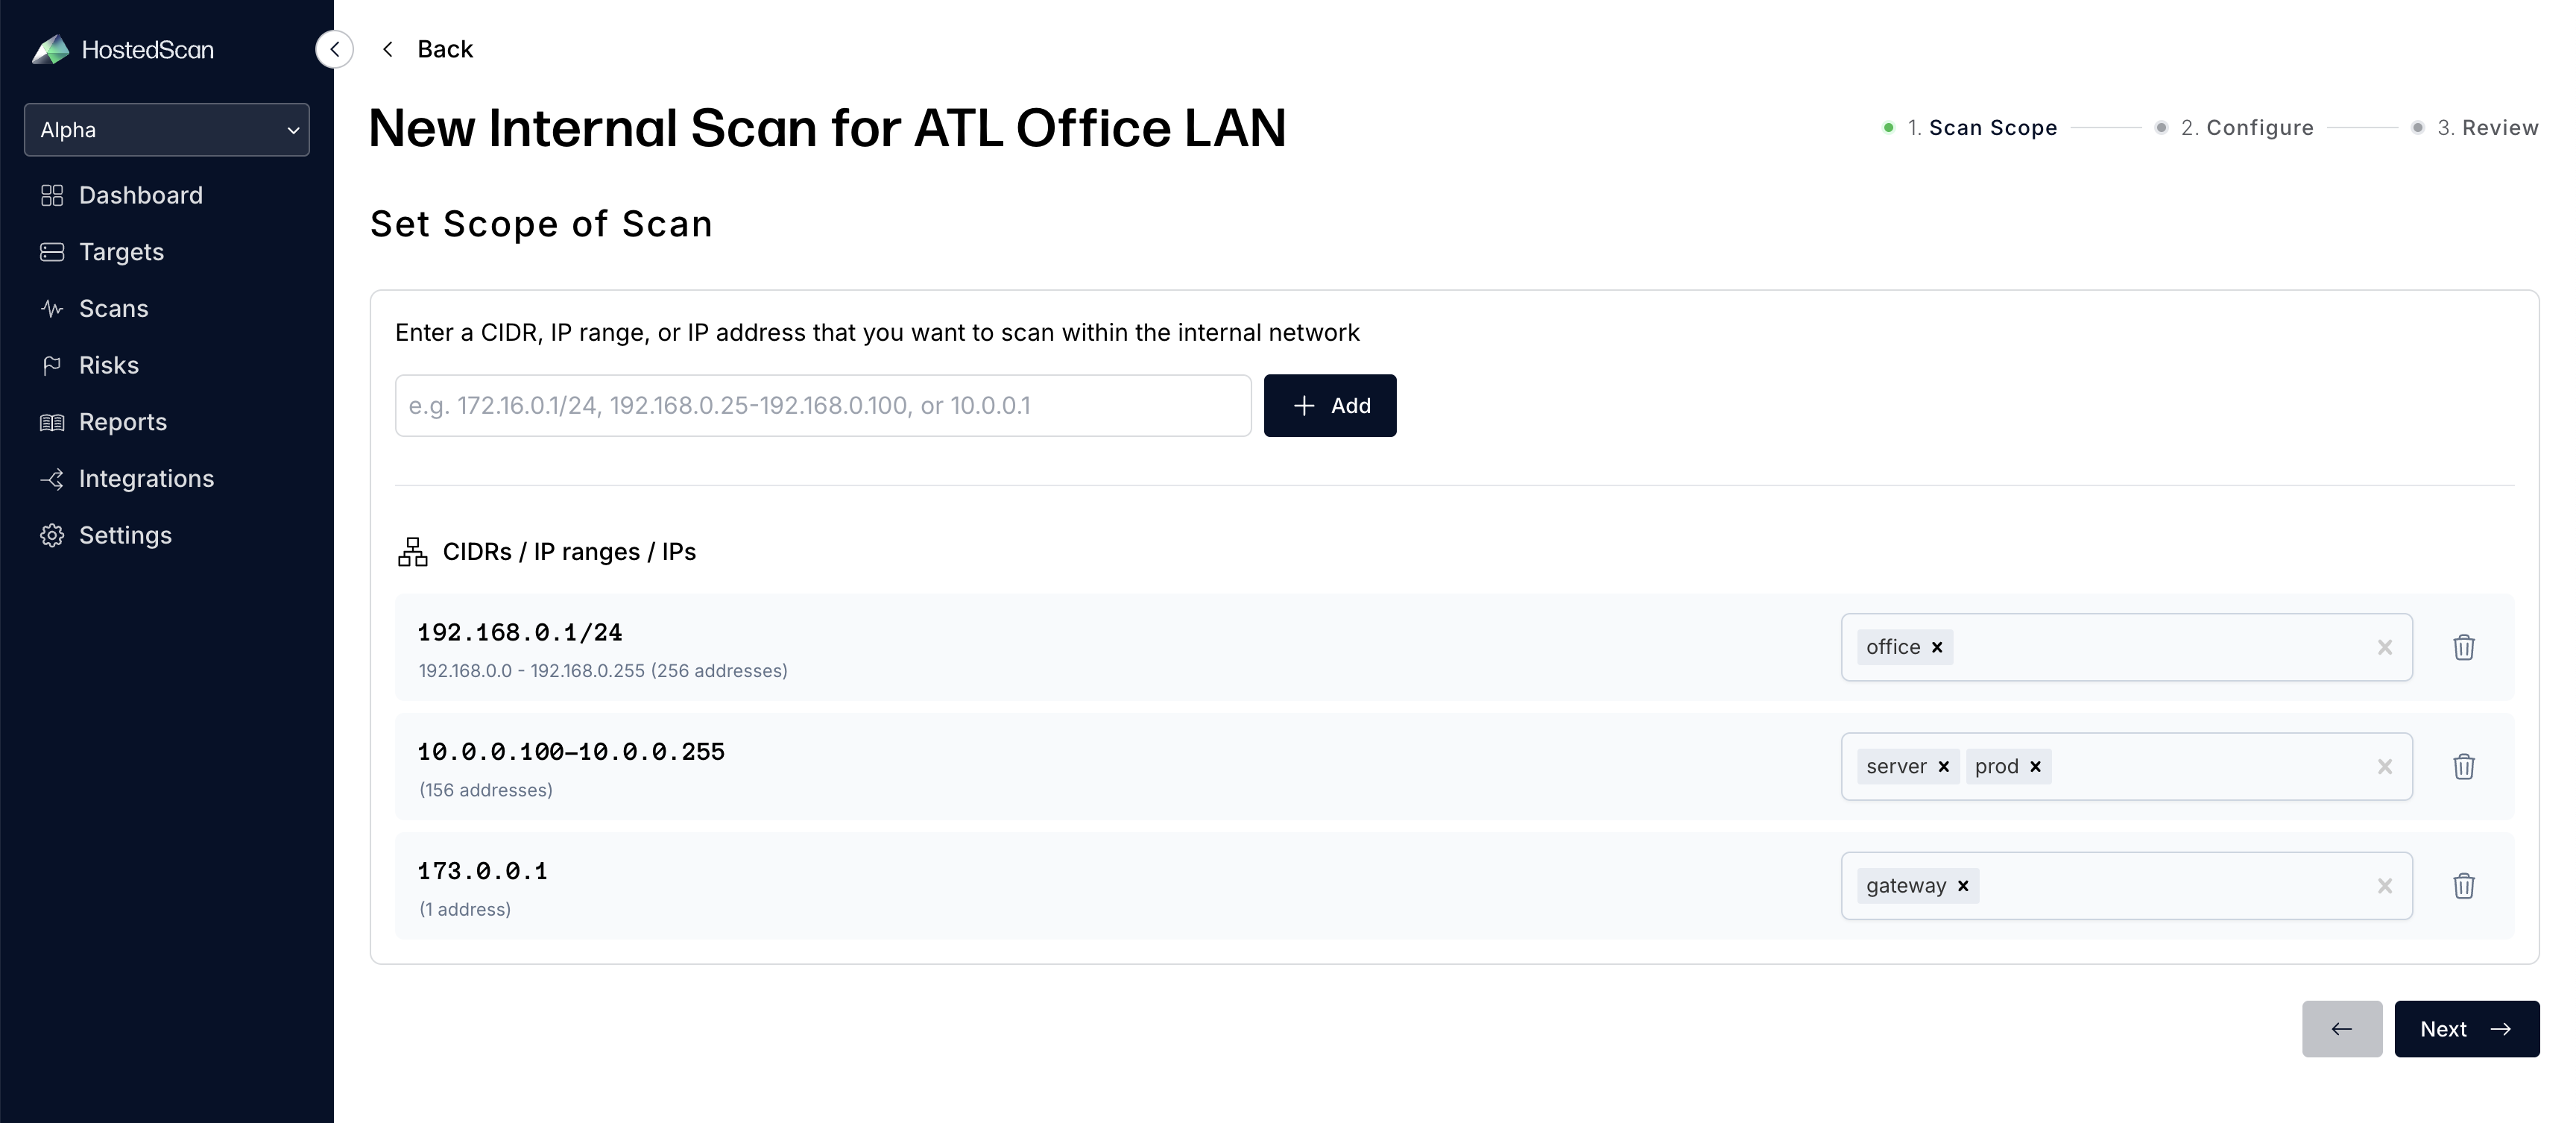
Tagging ranges during setup helps organize discovered targets by location, department, or function (e.g., "servers", "workstations", "DMZ"). Tags make it easier to filter and analyze results later.
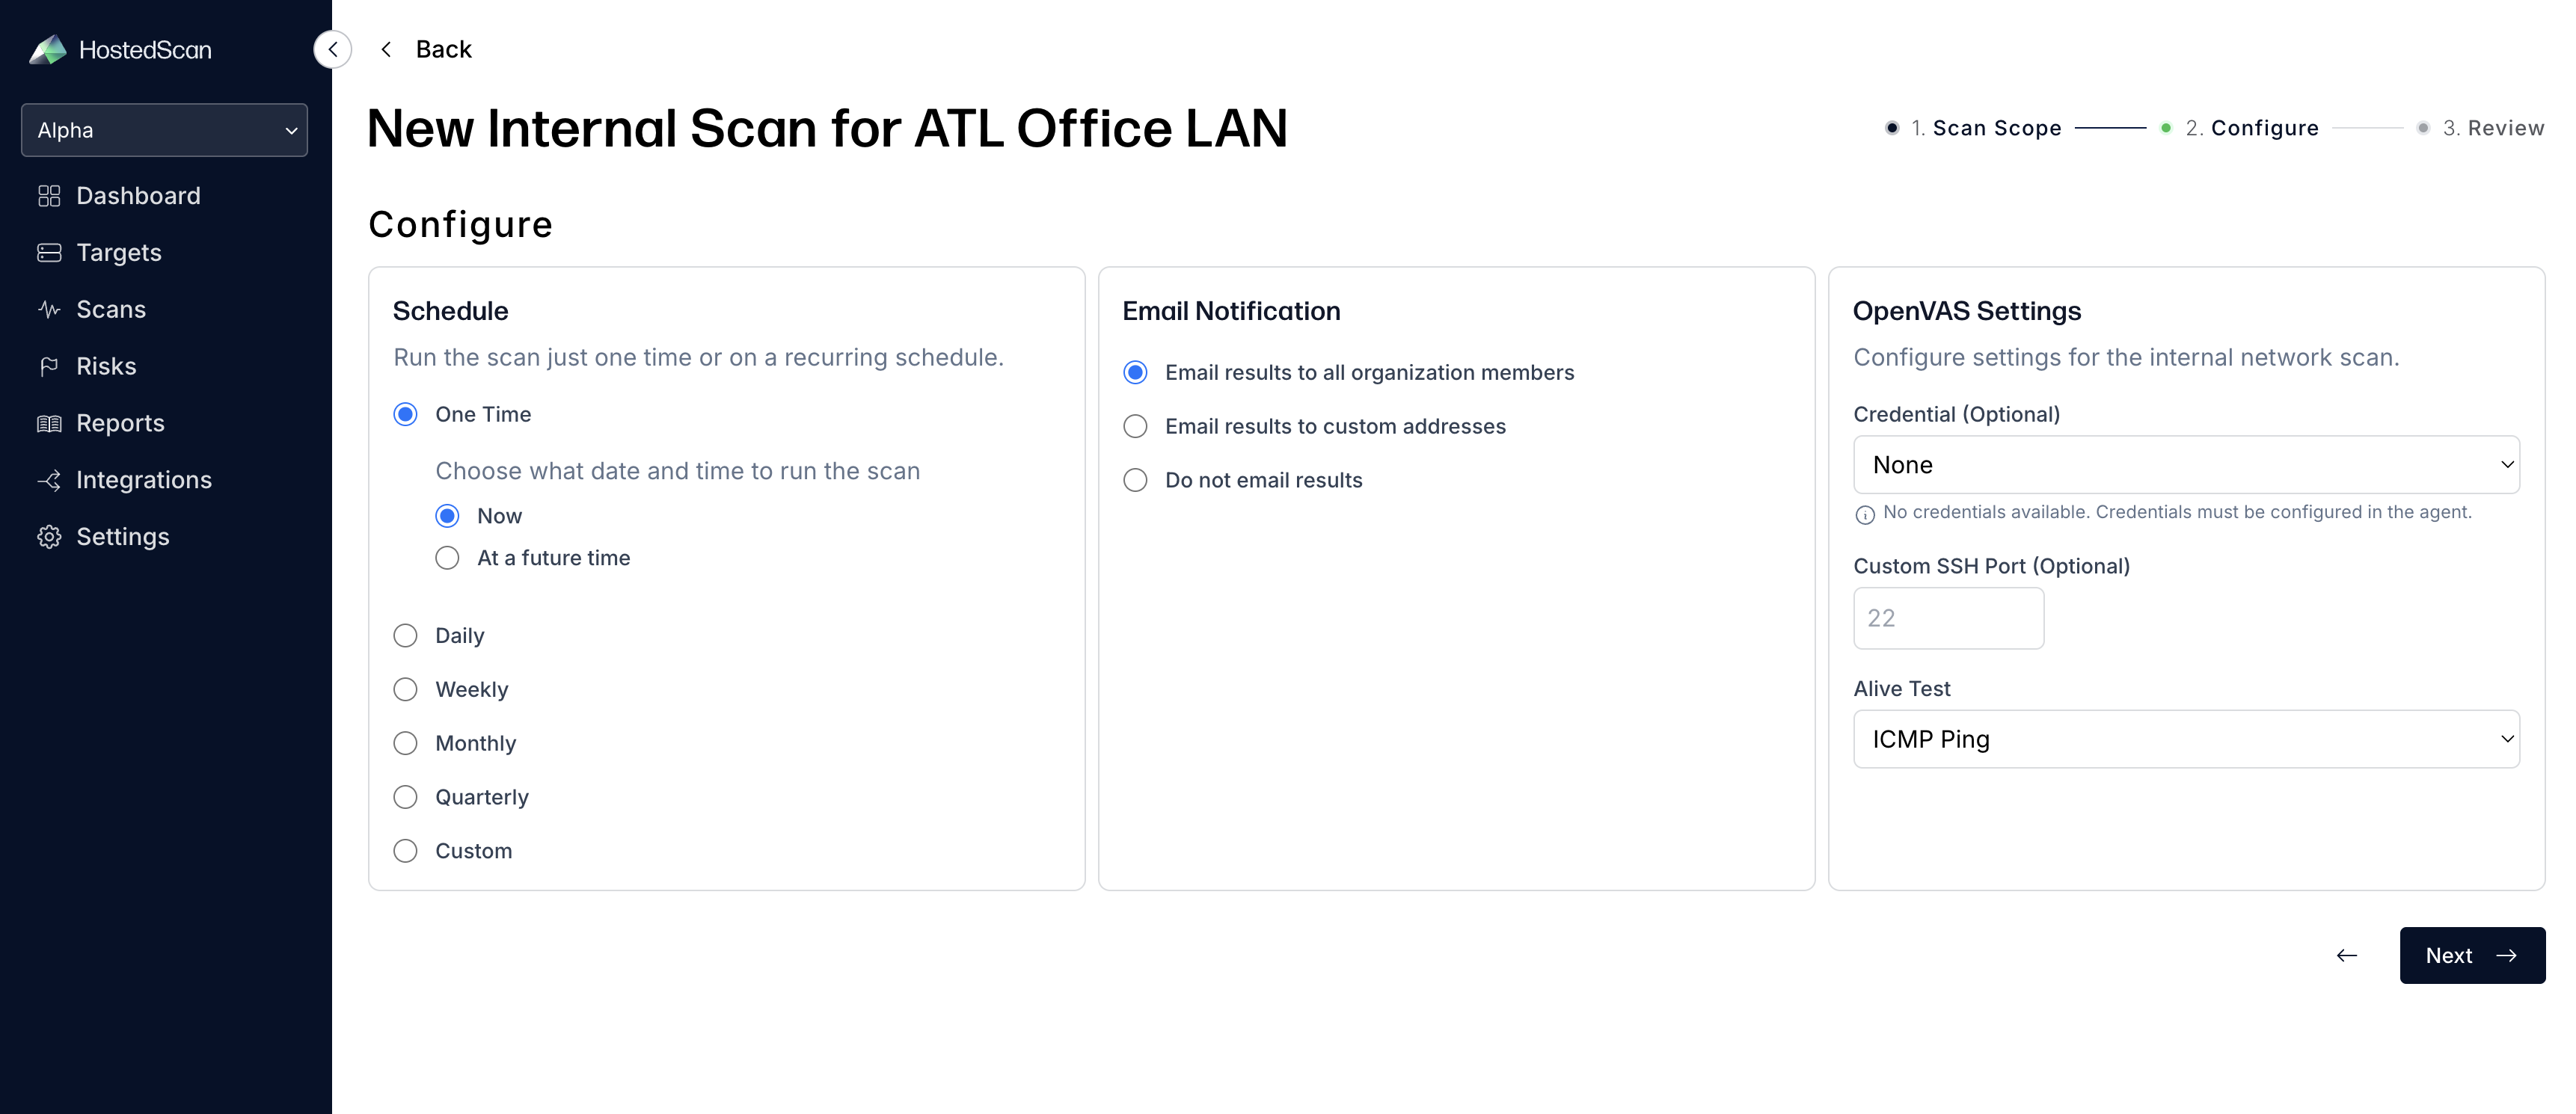
- Configure Scan Settings: Choose your scan configuration options including:
- Schedule when to run the scan (now or future time)
- Email notifications for scan completion
- OpenVAS settings for internal network scans (credentials, SSH port, alive test). See Enhanced Scanning with Authentication for more details on credentials and authenticated scanning.
- Review and Start: Review your scan configuration and click Run Scan to start the vulnerability assessment.
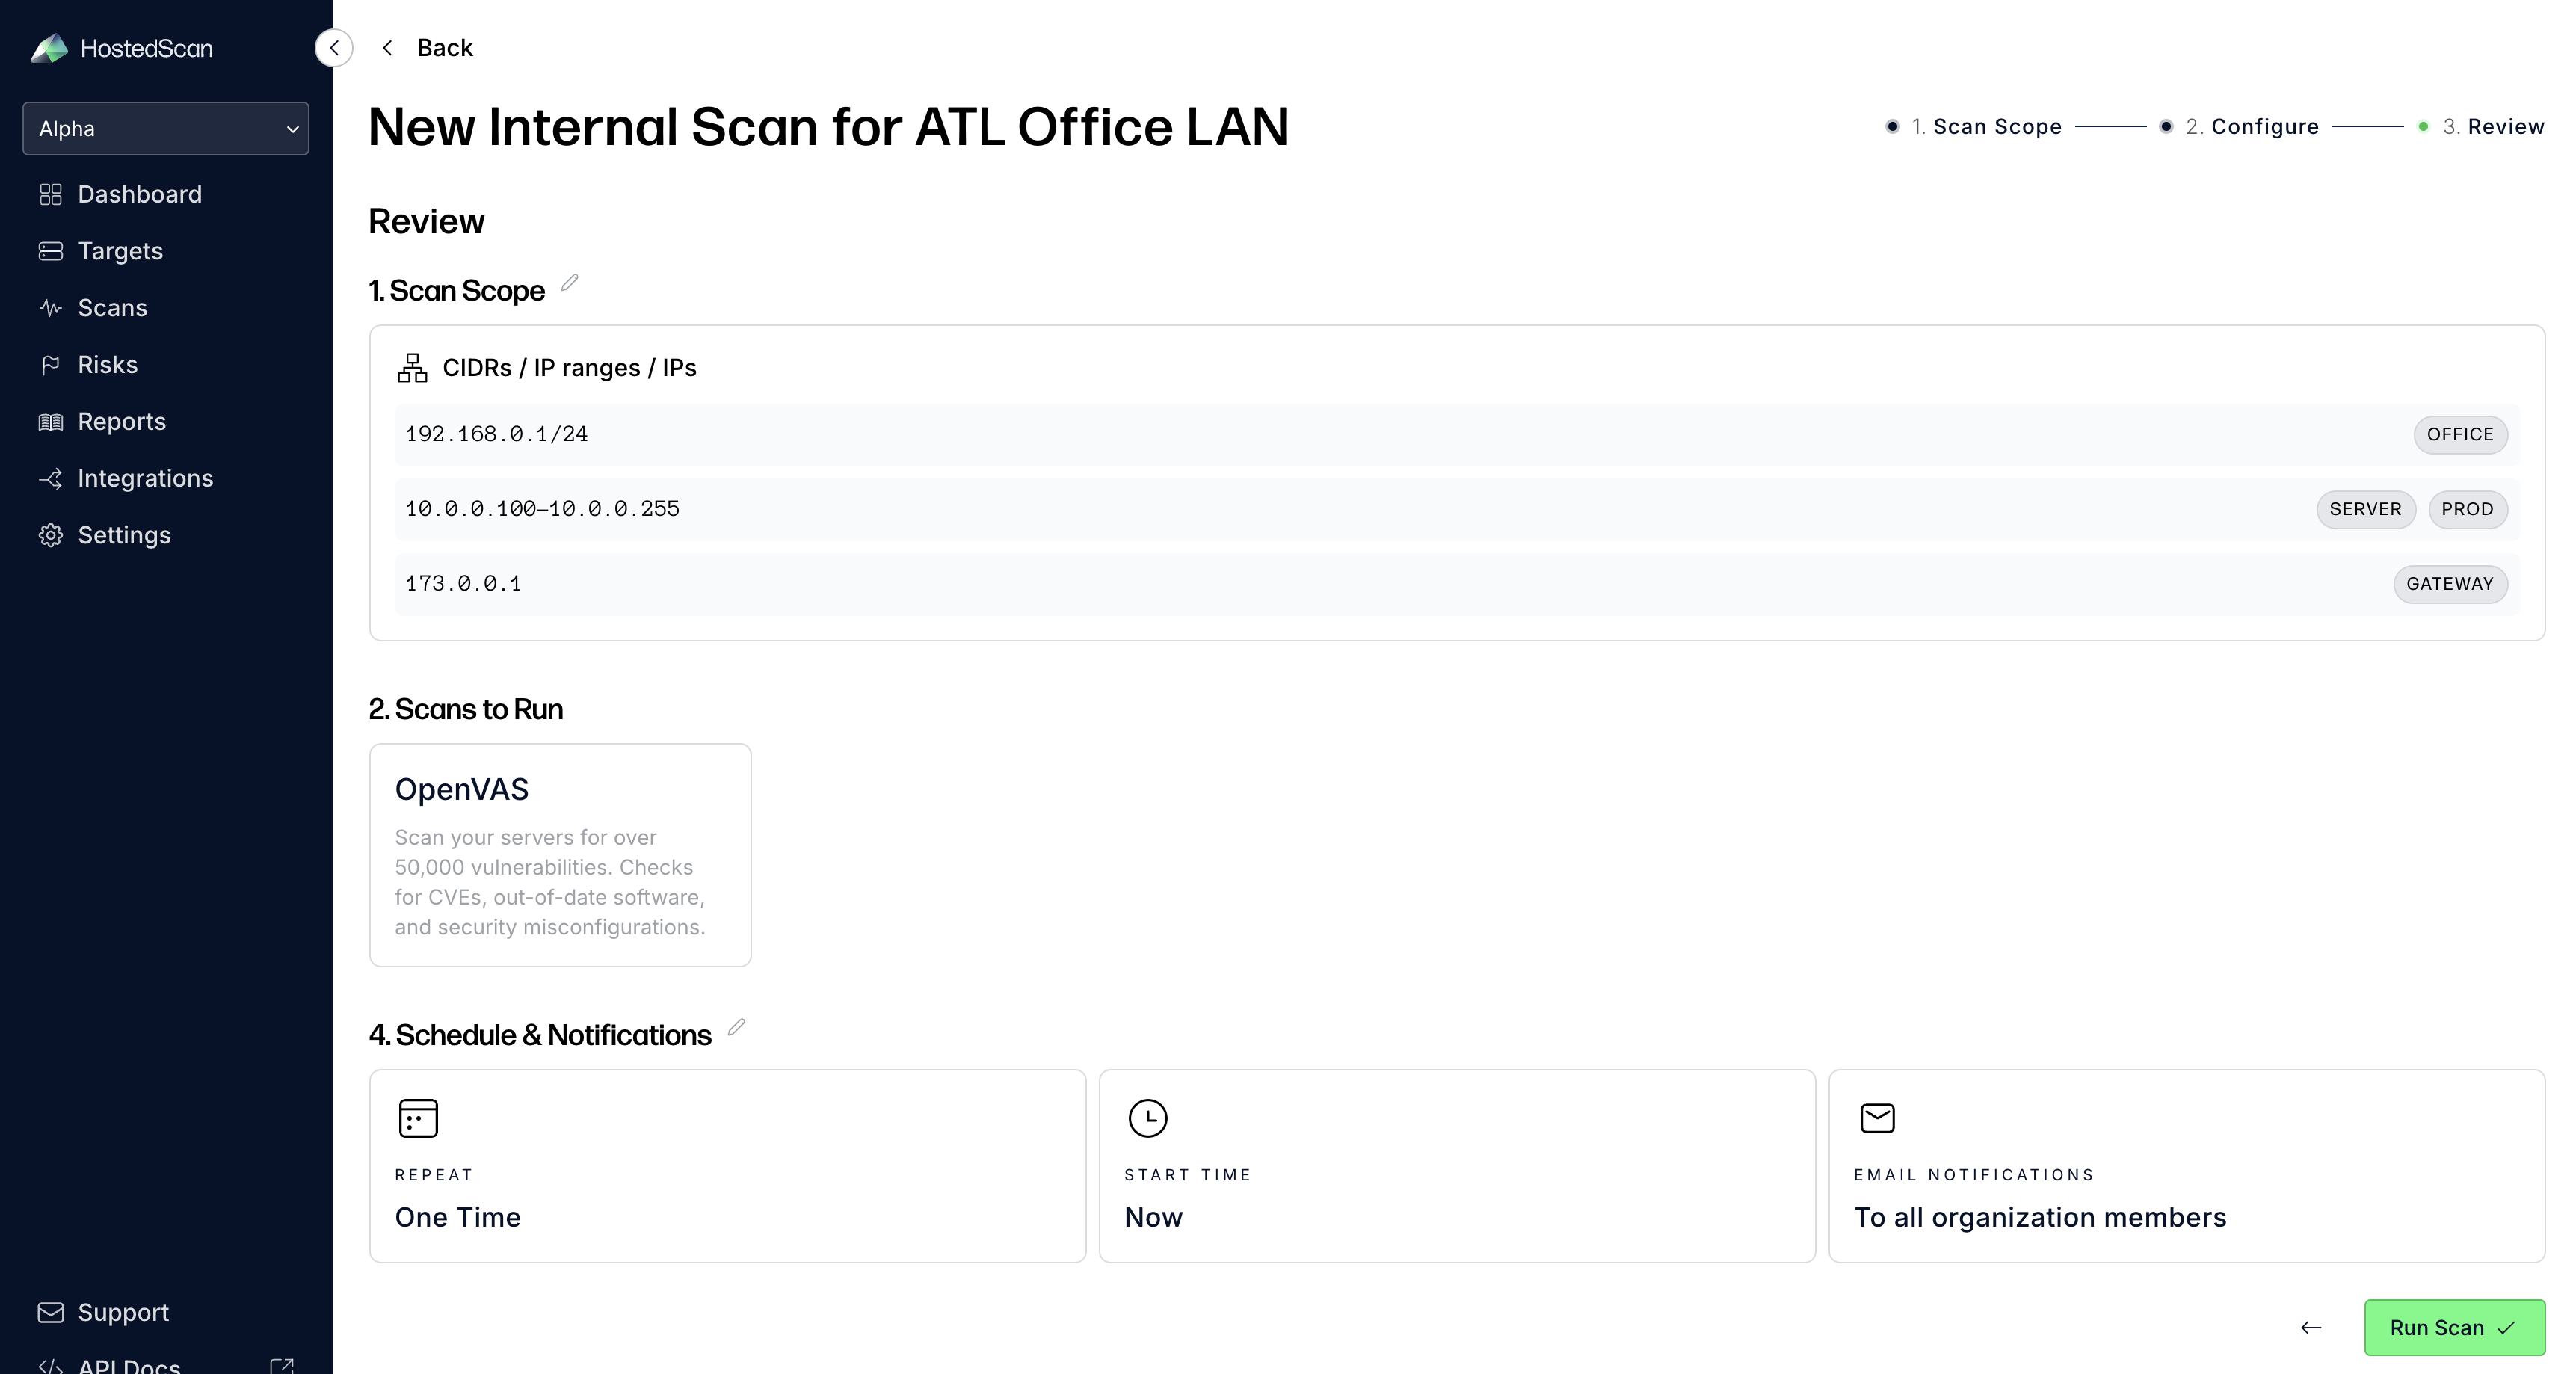
- Monitor Progress: The scan will begin and you can monitor its progress. Depending on the number of IPs and services running, scans may take hours or even a day to complete.
Once completed, the following information is available in the HostedScan platform:
- Scan reports - can be found on the scans page.
- Discovered Targets - can be found on the targets page. You can use the filters to narrow to the source network or by tags.
- Detected Risks - can be found on the risks page. You can use filters to narrow to the source network or by tags.
Enhanced Scanning with Authentication
For more comprehensive vulnerability assessment, HostedScan supports OpenVAS authenticated scanning which allows the scanner to log into target systems and perform deeper security analysis.
Authenticated scanning provides significantly more detailed results by accessing internal system configuration, installed software, and security settings that are not visible from network-level scans alone.
To set up authenticated scanning:
- Configure credentials on your scanning server using the internal scanner's credential management commands
- Test credentials against a target systems to ensure they work correctly
- Select credentials when configuring scans in the HostedScan dashboard
For detailed instructions on setting up and using authenticated scanning, see the Authenticated Scanning guide.
What's Next?
- Install the Internal Scanner on Linux - Detailed installation and setup instructions
- Authenticated Scanning - Set up credentials for comprehensive vulnerability assessment